Showing posts with label linkedin. Show all posts

Tuesday, November 24, 2009

Twitter Application Hootsuite Is Now A Social Network Communication Hub


Hootsuite Updated To Interface With LinkedIn And Facebook


Last night, I noticed that the 3rd party professional Twitter application Hootsuite went offline for maintenance. I really didn’t think much of it initially. Services like this go offline occasionally for routine maintenance and upgrades. But after 6 hours of not being able to connect to it, I knew something big was in the works.


Over the past few weeks, Twitter has made some major additions, one of them being the addition of lists. Professional Twitter desktop applications like Tweetdeck, and Seesmic recently made modifications to accommodate these updates, everything from the new way Twitter handles retweets to connecting with other social networks like Linkedin.

When Hootsuite came back online this morning, there were plenty of changes integrated into its structure. Now, not only does Hootsuite manages and organizes your Twitter lists, but it also interfaces to your Linkedin and Facebook accounts. This opens a host of possibilities which I’m sure we’ll explore in the coming weeks.

I’m sure that there were some other changes and upgrades integrated into Hootsuite to make it more stable and increase its flexibility. And I’m also fairly sure that there will be a few… surprises that we’ll stumble across as we move forward—you can’t make a major upgrade like this without a few oversights. But, these latest upgrades, coupled with some of the other features that were already integrated into the application, turns Hootsuite into a powerful social network communication platform.

You can find more descriptions of the Hootsuite upgrades on their blog here.

Monday, September 7, 2009

Free Social Media Icons For Your Blog

In a past post, I demonstrated how to acquire a badge from Linkedin and install the HTML code in your Blogger blog.


A number of you out there made good of that code and put it to immediate use.


Here’s what you need to know.

Facebook also offers a badge.


Plaxo offers a badge as well.


And Twitter gives you the opportunity to create a window into your tweets right on your blog.


The downside for some of these badges is that they take up a lot of real estate on your blog.


In perusing some of the other blogs out there and getting some insight from my friend Lewis Howes, I discovered a way to shorten down the badges into a few well recognized icons that will still allow your followers to follow you on your favorite social network.


For an example of what I’m talking about, see the sidebar on the right hand side with my social network connections on Linkedin, Facebook and Twitter. I’m still working on YouTube.


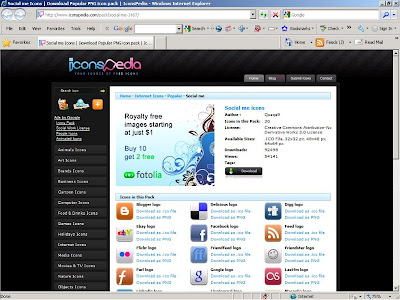
Before we talk about putting the connections into your Blogger blog, you will need to collect the social media icons. You can find these icons at a site called Iconspedia. These icons are subject to the creative commons license. While you can use them free of charge, don't alter the image as the logos belong to the respective companies. Still, for promoting your own personal brand and expanding your social networks, they can't be beat.


When you pull up the site, you’ll notice a bunch of different icon classes. The ones that we will use are the social media icons. You can find them by going to the catalog on the left-hand side and locating the “Internet Icons”. When clicked, it will expand to show your options. Click on the entry entitled “Popular” and then you will see a bunch of selections in the middle window pane.


The ones that we’ll use in the next blog post are in the “Social me” entry. Of course there are a number of other interesting entries and you can get innovative when creating the look and feel of your blog. What we will discuss can be transferred to any of the other icons.


But for now, hit the download button and you will begin downloading a zip file with all of the icons listed. For the “Social me” pack, that would be thirty, including icons for Linkedin, Twitter, Facebook and YouTube.


Be sure to place the zip file in a location where you will have easy access, and after it has finished downloading, go to the file location, double click the file and unpack the icons out of the zip file. This should be fairly straight forward, but if you have trouble, leave a message below and let me know.


You will end up with four variations of every icon: one file will be an ICO file type, and the other three will be of file type PNG in three different sizes, 32 pixels, 48 pixels, and 64 pixels wide.


The ones I’m using on the right side bar are 32 pixels wide.


Once you have these icons extracted, come back for the next post when we’ll look at how to put these into your Blogger blog with the appropriate social network.


Good Selling.

Thursday, June 4, 2009

Put A Linkedin HTML Signature In Gmail To Make Your Message Stand Out

While perusing my web stats, I noticed that a search kept coming up regarding how to put a LinkedIn button into an email signature, Gmail in particular.


I’ve seen these queries in the past and had even looked into putting some kind of LinkedIn button into the signature file of my Google Gmail messages. While there are email apps that will allow you to use html tags in the signature file, the one downfall of Gmail messaging is that it will only accept text characters in the signature box. It won’t accept HTML tags.


Today, however, I decided to take a quick spin on Google to see what was actually out there. And while I didn’t find a clean solution, I did find “A” solution and a Linkedin function that I had previously forgotten about.


However, this is truly a case of “buyer beware” because this workaround is more of a hack.


While it is simple to do and it will integrate your Linkedin signature with your outgoing Gmail message, this is not a push button configuration.


Here’s what I mean.


With your typical text signature, like the one you’ve typed into the Gmail signature box, the minute you hit the “compose message” button to create your next message, your signature file is automatically loaded into the body of the message before you even start typing.


You set the signature up once and you don’t have to worry about it ever again, until you are ready to change it.


With this particular hack, you have to install it every time you send off an email.


So if you have 15 emails to send off, this activity is what is commonly called overhead and it can be very high, significantly impacting your time management activities.


Do you want to do this activity every time you send out an email? Probably not.

But if you are trying to impress a client, or if you want to push your LinkedIn profile to encourage your certain clients and prospects to connect with you, this could be a useful hack.


Still game? Then read on.


Getting The Linkedin HTML Signature


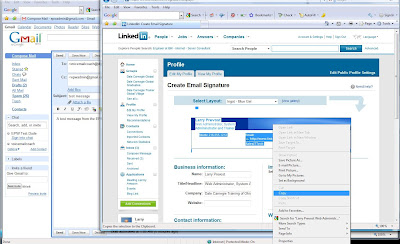
Turns out that some email apps will allow you to compose a rich signature file. Unfortunately, Gmail is not on that list. Gmail doesn’t support HTML tags in the signature file – yet. However, Gmail will allow you to drag and drop HTML objects into the compose pane. So you can create an email signature that looks real nice in LinkedIn, highlight the whole object, copy it and then past it into the body of the Gmail message.


First, get the signature.


Log into your Linkedin account and scroll down to the bottom of the page:
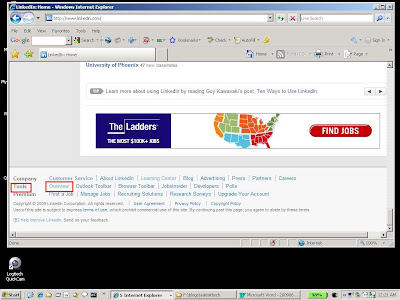


Finding the location for the linkedin HTML signature generator.

When you get to the bottom, you will see menu items that are more utilitarian. You want the “overview” link under the “Tools” heading. This will take you to the Linkedin Tools overview page. On this one, get down to the “email Signature” section and hit the “Try it Now” button:
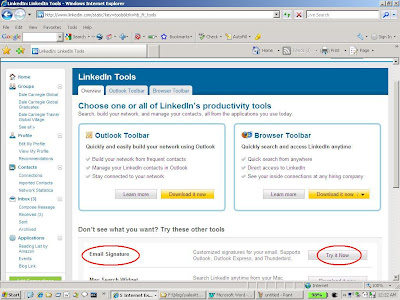


Linkedin Tools page.


When you hit the “Try it Now” button, you will be taken to the “Create Email Signature” page where you will have an opportunity to create your signature.
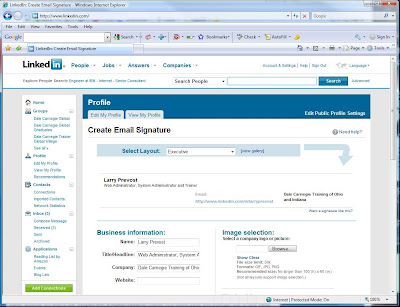


The LinkedIn signature setup page.

Linkedin provides several layouts that you can choose from.
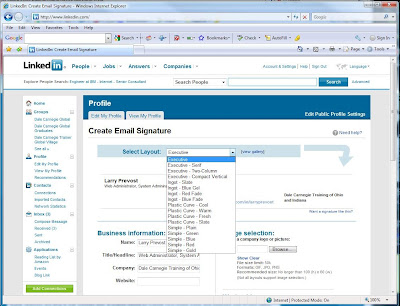


Selecting the Linkedn signature layout.

Select your layout that you like. Linkedin will also backfill some of the information, like your name, headline and company. But you will need to supply some additional information like phone number, the address or your company’s website, any additional websites that you have, and your company’s address.
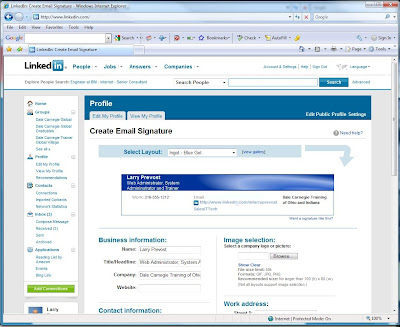


The Linkedin Signature template generated.

Once you have it set up the way you want, you can transfer it over to your Gmail message.


Bringing over your Linkedin Signature over to your Gmail Message


In another browser window, open our Gmail account. Here we again are using our old standby, the EPW Test Dude.
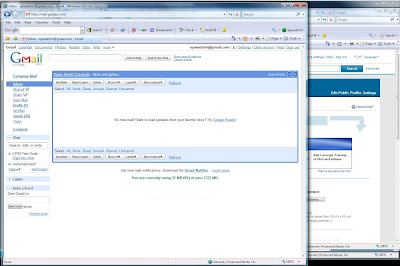


Preparing Gmail to receive the Linkedin HTML signature.

Go ahead and compose your message as you normally would:
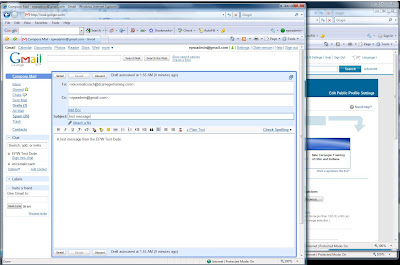


Creating the Gmail message.

When you have your message composed, go back to the browser holding your Linkedin session and highlight the signature that you just made:
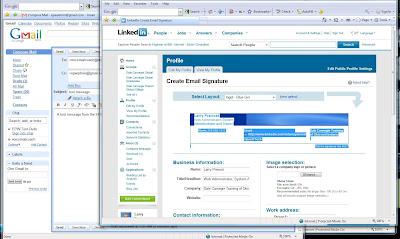


Highlighting the LinkedIn signature.

Then, copy the highlighted section:


Copying the LinkedIn Signature Object

And then paste it into the body of the message that you have finished composing in your Gmail browser window:
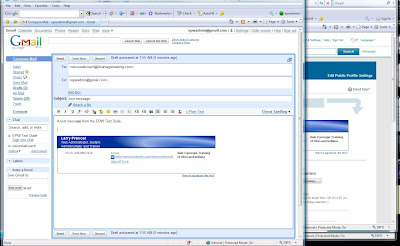
Pasting the LinkedIn Signature Object into the Gmail Message Pane.

Then, it just a matter of sending it off. When it arrives, it will look something like this:
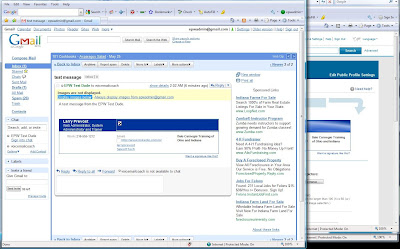


What the message looks like when delivered.

You’ll notice the funny little boxes in place of the missing graphics. The graphics aren’t gone. They just aren’t being displayed. As with most email programs, the default setup is to not display graphics, so count on your recipient not initially seeing your pictures. However, by merely clicking the link “Display images below” you can make the app display them.
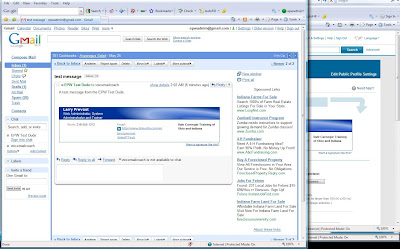


What the LinkedIn Signature looks like after the graphics are allowed to display.

See?


Quick, simple and easy.


However, this is by no means automated. So as I said at the top of this post, you’ll have to repeat the process for every email that you want to send out with the Linkedin profile signature. Not exactly the most heartwarming of thoughts, but it is possible to include a Linkedin profile in our outgoing email.


Kudos to Amit Agarwal at Digital Inspiration for discovering the hack.

Sunday, February 22, 2009

How To Add Your Linkedin Profile Button To Your Blogger Blog

In my last post on promoting your Linkedin profile using the Linkedin button, I explained how to grab the Linkedin button code from your profile page. Even had pictures showing how you can make that happen.

Sales people found it very instructional and appreciated the clarity. It saved them time and they didn’t have to go searching around their account looking for stuff. They could go straight to where they needed to go.

However, many of my fellow sales reps have since come to me saying, “Well, I got this code. What do I do with it now? How do I get it into my blog? Why do I want to do this? Can you do it for me?”

If you’ve created your own blog, then adding the Linkedin profile button is very easy. It’s even easier than creating your blog using Blogger. We ran through the steps of creating your blog in the post entitled How To Create A Blogger Blog And Start Creating Sales Leads.

Here is what you do to add your Linkedin profile button on your Blogger blog.

First login to your Google account. After you get logged in, go to www.blogger.com/home. This will get you to your Blogger dashboard where you can select your blog. Once you select your blog, select the “Layout” tab and then click on the “Page Elements” heading.

Adding your Linkedin profile as a gadget in blogger. The first steps.
The Blogger Page Element Layout Section

Find the link that says “Add a Gadget”. You will be adding an element to your blog. Click the link:

Selecting the Blogger Gadget for adding HTML code
Gadget Selection

As you can see, a new window will appear. You will select the type of element to add from what appears in this window. In this instance, hit the plus sign (“+”) next to the element entitled "HTML/JavaScript". This will open up a new window to add in your HTML code:

The window that will allow you to add your Linkedin Profile code
The Configure HTML/Javascrip Window

Go collect the HTML code from your Linkedin profile page as we talked about in the post entitled Linkedin Profile Enhancement In Less Than 3 1/2 Minutes and paste the code in as shown:

Adding the Linkedin Profile button code into the HTML Gadget
Adding The button Code from Linkedin

Then add a suitable title:

Provide a suitable title for your Linkedin profile
Adding An Appropriate Title for Your Profile

And hit the save button. Your layout page will look like the following:

The HTML Gadget in your Blog Layout
The New Gadget is Now In The Page Layout

And if you hit the “View Blog” link, you’ll be able to see your blog with your new Linkedin button:

The Linkedin Profile Button on your Blogger blog
What The Linkedin Profile Button Looks Like On Your Blog

And you are ready to go. Just like I said, so easy even a caveman can do it.

We’ll talk about adding other elements later. But for now, realize that this is yet another step in starting your personal sales lead generation program and promoting your expertise.